Friday, March 13, 2015

Zesty Ginger Ale Chicken N' Veggies


SPRING has finally shown her glorious face here in the MW!! Thank heavens, because I was starting to get one serious case of fever folks! That polar vortex rubbish was no joke; it had me feeling all kinds of unmotivated and sluggish. Isn't it funny how just a little sunshine can really brighten our days? I'm feeling all kinds of energized now like my lil' solar battery of a spirit has been fully charged or I just chugged a pot of coffee, jug of soda, and a couple red bulls type of amped up! Fresh air, sunshine, and temps that don't freeze your face give me happy vibes galore. On another positive note, I just welcomed a new fur buddy to my pack, named Quagmire. He's a total ball of too much youngster energy (& a little creep lol)! If puppies can't lift your spirits and put a lil smile on your face and some pep in your step, I don't know that anything can!? FOR REAL, if you don't like puppies just hit the back button now, cuz we can't be pals, seriously though. N.E. WHO < Moving onto this Divine Ginger Ale Chicken, it's so freaking scrumptious peoples! I've seen numerous recipes for Dr.Pepper & Coke Pulled Pork, 7-Up Chicken, and I personally, adore BBQ Root Beer pulled pork, but what about some GINGER ALE MEATS YO?! It seemed like that left out, misfit soda in all these meaty creations on the inter web, so I decided to show it a little love and embrace its' unique gloriousness. PLUS, Ginger Ale just so happened to be on sale for 99 cents a 2 Liter (and whole chickens were on sale as well, so it was like the cosmos wanted me to make this glorious thrifty, chicken concoction for y'all lol)! Move over Dr.Pepper, Coke, and 7-UP, because it's Ginger Ales' time to shine ;)


Whatcha ' Need:

  • 5-7 lb Whole Chicken (mine was slightly over 7lbs, and it will serve many of delish purposes to follow)
  • 2 cups Ginger Ale (more/less depending on size of bird^)
  • 5- 7 med/lg Russet or Idaho potatoes 
  • 1 large onion (diced)
  • 1/2 bag frozen green beans (or 1 can drained)
  • 4 TBS Cold Butter or Margarine (cut into 4 slabs) 
  • 1+ tsp each of lemon pepper, paprika, cumin, & Italian Blend seasoning
  • 1/2tsp +/- garlic powder, oregano, salt, (& Cajun seasoning opt) 

First, gather all the dry spices, and place the recommended or desired amount in a small mixing bowl, and measure out the ginger ale and set it aside. Then lightly grease a large roasting pan w/ non stick cooking spray.


Next, rinse the inside & outside of the chicken in your sink, remove giblets/neck, and pat it dry w/ a paper towel. Place the bird breast side up in the middle of the greased pan.


Now, take the dry spices and rub them all over the outside of the bird, sprinkle inside, carefully, pull up on the chicken breast skin and rub spices underneath the skin as well. (wash those dirty bird hands after touching the raw chicken and b4 touching anything else to prevent spreading the funkies all over the place lol)

Sorry about the awkward view, but this way you can more easily see how I put the spices/butter under the skin as well ;)

Next, cut half a stick of butter into 4~ TBS sized slabs and place them underneath the chicken skin a top the breast region.
Adding butter under the skin makes for a super moist chicken if it's not over cooked ;)


Preheat oven to 350 degrees (F)


Now clean, remove funky spots, and cut the potatoes into nice hearty sized chunks like (6-8 chunks per potato or so). Spread them around the chicken in the pan along with the diced onion. Sprinkle the potatoes w/ a dash of the seasonings used to coat the bird (like 1/4 tsp or so just for extra flavour)


Pour the ginger ale over and inside the bird's cavity and on top of the potato/onion mixture in the pan.

Cover the chicken with aluminum foil and bake for about 1.5 hours depending on the size of the bird.


My chicken was slightly over 7lbs so I baked it for 1 hour and 45 minutes with the foil on. (about 20 minutes per pound is usually a good rule of thumb when making any large chunk of meat in the oven)


I removed the chicken from the oven, uncovered it, and basted it with the yummy pan juices. Then, put in the frozen (or drained can) green beans and placed the chicken back in the oven with the foil off for another 35-45 minutes or so (again depending on the size of your bird).


Many chickens have pop up timers, but they can not always be a great indicator of actual doneness so always test w/ a meat thermometer (and by wiggling the leg on the chicken) The thigh is the thickest part of the chicken, so if the leg seems super jiggly like it could fall right off with a slight tug and the juices are clear then the bird is most likely done, but again, always check with a meat thermometer if unsure, by inserting it in the thigh region of the chicken (not breast).

    
When that beautiful bird is all done let it nap/rest for about 10 minutes before carving into it so the juices will redistribute and you don't end up with a super dry chicken situation (icks lol). Now prepare to rock your world and wow the fam with this easy but SUPER YUMMY, zesty chicken dinner winner!


I hope you dig this dish! Thanks for popping in, and big HUGS!


Friday, February 27, 2015

Creamy Street Corn & Smoked Sausage Chowder


Whelp, it has been a hot minute or two since I last posted aye!?! This gal totally needed a lil mental vacay. Thy wretched polar vortex really had me in a bit of a cold funk to put it mildly @!&*. I just wanted to curl up under like 3 blankets, with mittens & earmuffs on and hibernate until April lol! DEAD SERIOUS though, I was getting a tad edgy. Thank goodness, however, the sun has shown its' glorious face and the snow has stopped falling (at least for now) because I had one rad case of winter blues/blahs brewing up!! It's still only like 20 degrees out in the OLE MW... but after weeks of subzero temps, 20 degrees feels fantabulous like a tropical heatwave almost. This beautiful sunny day has got me ready to bust out my sandals, do a little happy jig, and was a MUCH NEEDED REMINDER THAT THIS TOO SHALL PASS! Before too long we'll be Sprung! HECK to the YES. Speaking of warm happy stuff.... this cozy, comforting, creamy Mexican Street Corn Chowder is like a fuzzy poncho for your cold soul! For real though. This easy, zesty chowder has all the yummy flavors of Mexican Street Corn on the cob plus smoked sausage, chili beans and so much more. HELLO GORGEOUS! YUP, this chowder thawed my icy cold heart and made me do a double take ;) Lucky for you folks... I'm a sharing/caring person :D but don't yawl come crying to me when this soup rocks your world; you've been warned :)


The cooking culprits aka ingredients:


  • 2 cans creamed corn
  • 1 pack smoked sausage 
  • 1 can chili beans or red kidney beans (the ones I used were canned in hot sauce, but if not drain them)
  • 1-2 Jalapeno Peppers seeds and all finely diced (or if you don't do heat too well, 1 red bell or canned green chilies would do too)
  • 1 large yellow onion, diced
  • 2 cups reduced fat milk
  • 1/2 cup Mayo (low fat)
  • 1 cup Sour Cream
  • 1 can water (+2/3 cup for sausage)
  • 2 TBSP Butter
  • 2 tsp chili powder, 1 tsp oregano, 1 tsp cumin, 1 tsp garlic powder (salt and pepper to taste)
  • Opt~ 1 TBSP jarred pepper juice, lime /lemon juice, or white vinegar (just to cut some of the sweet)  


First, slice each smoked sausage in half lengthwise twice and slice the halves horizontally into little spoon sized chunks (1/2 inch thick or so). Place the sausage chunks in a large pot w/ 2/3 cup water and them sprinkle with 1/4-1/2 tsp of above the mentioned spices. Cook on medium high heat for about 10 minutes or so until all the water is absorbed.


While that cooks, dice up your peppers and onion. Once all the water is evaporated, toss in the diced pepper, onions, and 2 TBS butter. Cook it for about 10-15 minutes or until the veggies are tender and the sausage is nicely seared.

Helpful tip when cooking with hot peppers~ Always taste test the heat of the pepper prior to tossing it into ANYTHING. Take a seed and touch it to the very tip of your tongue briefly and you'll know what kinda heat your really dealing w/ b4 it is too late lol! I had originally planned to use 2 whole peppers, but only did 1.5 once I realized the fierceness of the pepper, good thing I did cut back because my fella would have been crying hehehe!


Once the sausage and peppers are looking and smelling delish, dump in all the canned goods, 1 (15 oz) can of water, 2 cups milk, and the remaining dry spices. (I filled each creamed corn can about half way w/ water and sloshed it around a bit to get all those can corn clingers out lol)


 Reduce heat to medium low, cover pot with lid, and cook for about 45 minutes or longer stirring occasionally to prevent sticking. The longer the better, but if you're in a crunch for time a half hour aught do just fine ;)


Next, reduce the heat to low/simmer & stir in the sour cream, mayo, and pepper/lime juice (opt, but recommended) and cook for 15-20 more minutes. (Add additional seasonings to your taste palette preferences)

 
Finally.... Turn that hot little number off, let it cool, and top it with some shredded Mexican Blend Cheese, crushed tortilla chips, cilantro and or whatever spunky toppings you'd prefer! Prepare to depart to feisty flavor town; for real folks, this corn chowder is like a happy, hearty fiesta in your mouth, the kind that makes your taste buds want to tango!  Cha cha cha bomb :)   


Hope you enjoy, Big Hugs, and Thanks for popping in!


Friday, February 13, 2015

Easy Cheesy Buffalo HOT dogs


Fast, Easy, and Flavorful were my culinary criteria for dinner yesterday. I was fiercely committed to spending minimal time in the kitchen and pretty much doing as little as possible around my house. Nice goals aye' lol!?! I think we all need relaxing lazy days here and there or we're destined to get burnt out. All work and no play is just no good. I'm not trying to encourage mass laziness by any means, but I do encourage a healthy balance of fun and grind. All work or All play is just unhealthy; we must find/commit to that balance just like with all the other areas of this crazy life. So um yeah, yesterday was my self designated adult play day that was to involve as little work as possible! Which included not fussing over food, just keeping it simple and satisfying. It's not that I don't love cooking up crazy concoctions, because I truly do enjoy it! I find cooking to be a great creative outlet and I GENUINELY... love the pure artistry of making a delicious one-of-a-kind meal and playing with food responsibly (plus, we gotta eat yo's lol)! Like I said though, I needed a nice lazy, low key kinda day to get rebalanced, embrace my inner bum, and just unwind. Does it get any easier or cheaper than prepackaged hot dogs in life (for real though lol)?!? Not much, that's for sure!  However, I wasn't just gonna throw some blah dog in a bun and call it a day, not that I wouldn't go ham on a plain dawg, I just figured since I WAS ONLY making hot dogs for dinner, no sides, no NADA, I'd spunk them up a tad to make it seem more like a gourmet dog while maintaining the minimal fuss philosophy. Thee ol' man said "this might be the best hot dog I've ever had," #mindblown lol! So even with minimal work and effort, my dawg was still able to pack mass flavor and possibly change my dude's life, TOTAL SCORE ;)


Whatcha' need: 


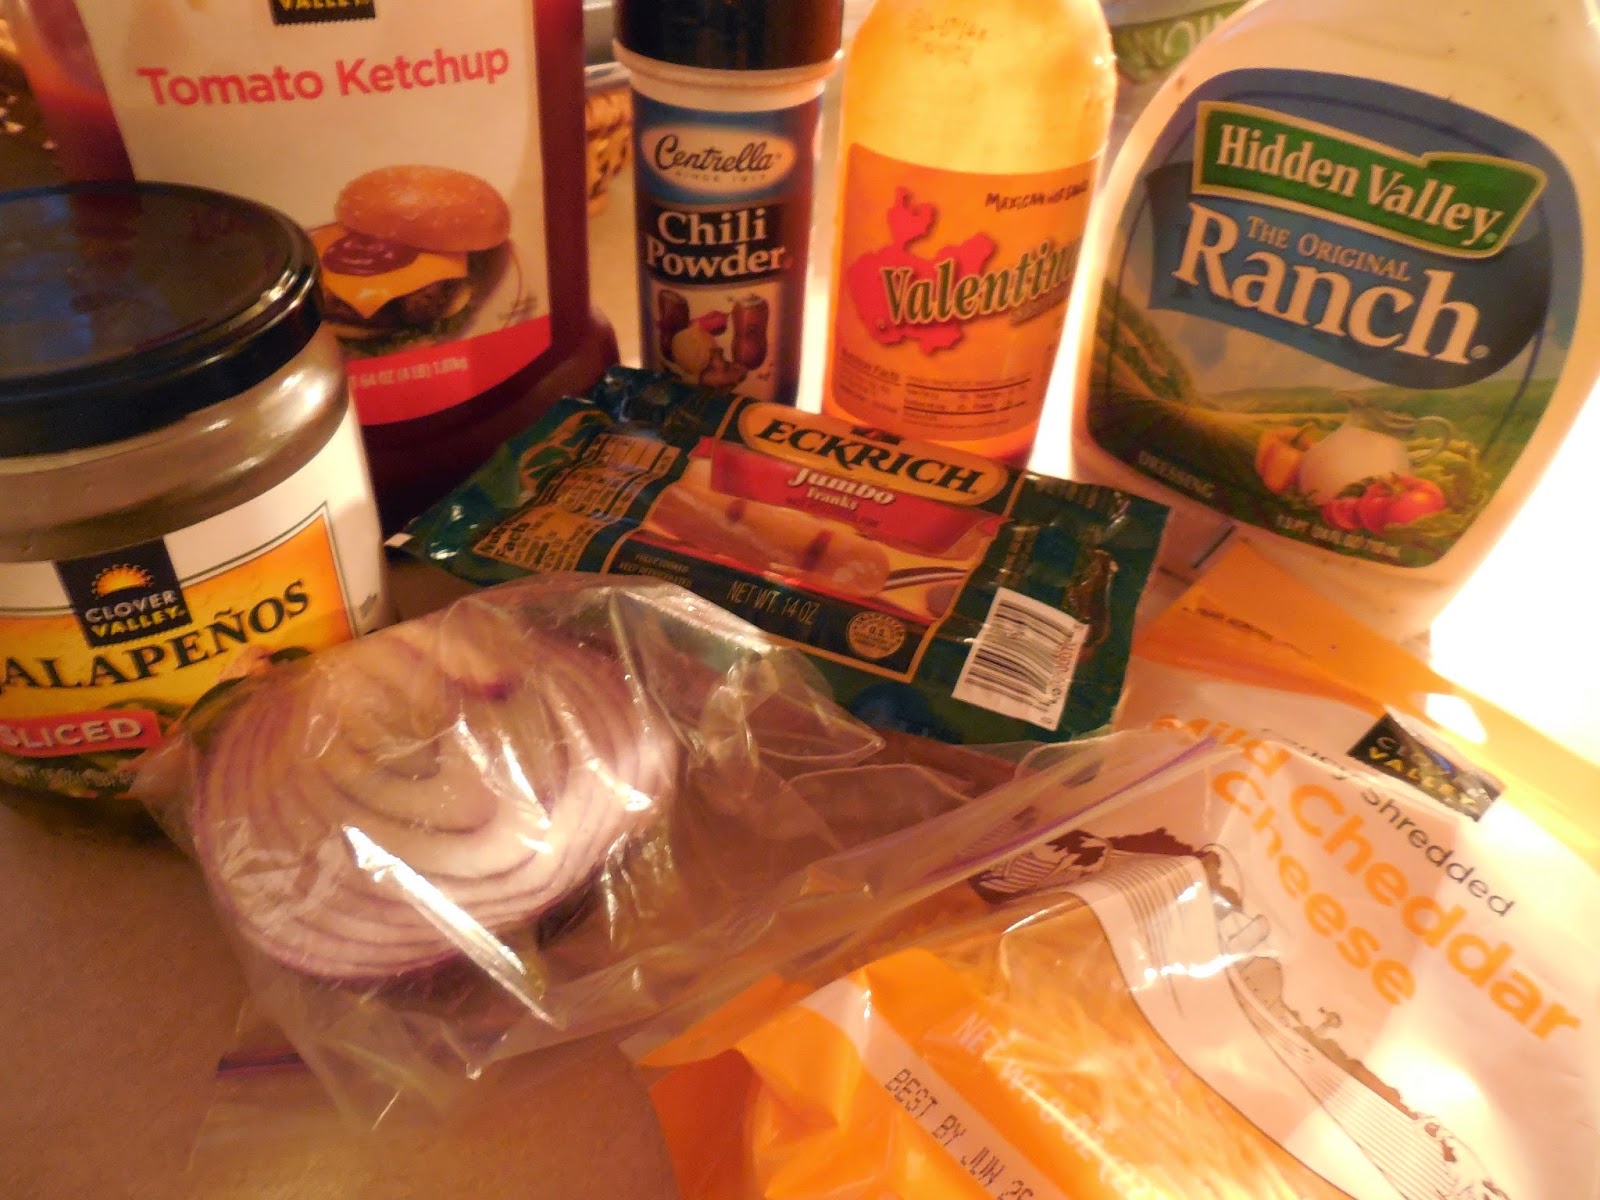
  • 1 pack hot dogs (I used all beef, but any dog would do)
  • 3-4 TBS of Hot Sauce
  • 2/3-1cup Ketchup
  • Bottled Ranch Dressing (or Blue Cheese, we're not blue cheese folks around here, but use whatever cool, creamy dressing you prefer)
  • 1 cup shredded cheddar cheese
  • 1/2 cup water
  • 1/4 tsp each of oregano, garlic pepper and lemon pepper
  • 1/2 tsp chili powder
  • Hot Dog Buns 
Optional, but highly recommended~ 1/4 cup diced Red Onion and Jarred Jalapeno Slices for garnish


Place the hot dogs and water in a large skillet and sprinkle them with half of the above suggested dry seasonings (approx). Cook over medium heat for about 10-15 minutes or until the dogs swell and all the water has evaporated.


Once the water has vanished, lower the heat slightly and allow the hot dogs to brown up and get crisp on the outside to your desired liking. We prefer them a little darker like they just came off a grill, so I let them brown for about 5-10 minutes, frequently rolling/flipping them about to avoid excessive charring, but still giving them enough space to do their charring thang ;)


Meanwhile, in a small bowl combine the hot sauce, ketchup, and the remaining dry seasonings (easy huh!)


Once the dawgs have the texture and color you like, turn the heat down a tad and smother them in the hot sauce mixture. Try to show all of them equal love and spread them around in the sauce. Rolling and turning them for about 5 more minutes until the sauce is mostly absorbed and they all look well coated.


Then turn off the heat, sprinkle them with the shredded cheddar, and cover those beauts with a lid or plate for about 5 minutes. Just so the cheese can get nice and gooey, and proceed to yumville!


Meanwhile, grab your buns...ranch dressing, and dice up the onion and pepper. Now we construct thee Cheesy Buffalo Dog


Place the gooey cheesy hot dog in the bun, drizzle it with ranch dressing, and sprinkle it with onions and peppers. WHAM BAM! We just made an easy, but fanciful Cheesy Buffalo HOT dog and only dirtied a few dishes! ~ Insert Happy Dances~ This dawg would go great with some mac n' cheese, a baked potato, simple salad or is satisfying enough Ala solo.


Hope you enjoy it as much as we did, cuz' it's pretty doggone good ;) Thanks for Popping In and Big Hugs!


Tuesday, February 10, 2015

Fully Loaded Jalapeno Popper Potato Frittata


I <3 breakfast foods. CERiously. One of my all time fav comfort foods is a simple fried egg sandwich; it's versatile (endless combo opts), easy, comforting, and it takes like 7 minutes max. to throw together! I was literally raised on breakfast foods for dinner, it was one of my favorite nights of the week actually. HECK TO THE YEAH pancakes, french toast, fried eggs and bologna sandwiches, biscuits and gravy (my Bros' favorite, which almost made me hate it as a kid because almost EVERY SINGLE TIME my Mum asked what they wanted to eat... 95% of the time it was friggin B&G, like I was in total food shock if they chose something different lol), oatmeal and toast, or really anything smothered in maple syrup is a win! No joke though, if you're serving breakfast food at night I'm SOOo down to chow w/ you. I don't care if it's 4 in the wee morn or 11 at night, I'll eat french toast and fried potatoes like they are goin' out of style (tho, I'm pretty sure they'll forever stand the foodie tests of time aka timeless)! If loving breakfast at night is wrong then I definitely don't want to be right ;) Any who....this "egg bake," as my Mum would call it, is fully loaded with crispy bacon and potatoes, zesty jalapeno peppers and red onion, gooey globs of cream cheese, and of course the magnificent, wondrous, under-estimated EGG! YUP, this dish has it going on like King Kong Peoples! Brace yo' selves for edible magic ;)


The Culprits aka Wicked Good Ingredients:


  • 1/3 diced jalapeno peppers
  • 1/2 lb bacon (pork or turkey)
  • 8 large eggs
  • 4 medium sized russet potatoes (or about 2 cups frozen, thawed southern style hash browns)
  • 8 oz Cream Cheese 
  • 1 cup milk
  • 1 cup shredded Mexican Cheese (or Pepper Jack)
  • 2 TBS of Hot Sauce
  • Opt~ 1 TBS of Pickled Pepper Juice from Jar Jalapenos
  • 1/2 of a Large Red Onion, finely diced (or 1 small)  
  •  Additional Spices To Your Preferences: 2 tsp Chili Powder, 1 tsp Garlic, 2 tsp Salt, 1 tsp Red Pepper Flakes, 1 tsp Lemon Pepper, paprika

Start by prepping your potatoes. Clean and remove skins that are knotty or contain icky blemishes. Cut the potato into fourths (or in half twice) then dice them into similar sized 1/4 inch cubes or chunks. Place them in a medium sized sauce pan and cover them with water and sprinkle w/ 1 tsp of salt. Bring them to a boil over medium heat and cook about 10 minutes or so until fork tender. Drain the potatoes well and set aside.


Still working on this food photo jazz, bare with me folks lol

Now let's talk bacon. I always add a sprinkle or dash of seasoning to the bacon like lemon pepper or chili powder just for added depth and extra yum, but bacon is beautiful just as is so season or don't season to your liking. Pan fry the bacon in a large frying pan over medium heat until crisp or two your desired liking, if they are a bit extra crispy that's okay too!! They'll be taking a soft bath in eggs soon enough so no frets!


 While the bacon cooks, start prepping your red onion and jalapeno peppers. Red onion is pretty assertive so I decided to only add a half, but it's your thang do what you wanna do ;) 


Once the bacon is all cooked and cooling on a paper towel lined plate, turn the heat down a tad and slowly add in the onion, peppers, and potatoes to the pan with the bacon drippings. These items all contain water content so carefully and slowly is key when adding them to hot grease to prevent painful chaotic happenings lol!  Drizzle the potatoes/veggies with hot sauce and sprinkle with 1 tsp chili powder, garlic, red pepper flakes, 1/2 tsp salt and fry for about 10-15 minutes stirring occasionally to prevent sticking or burning.


While all that is going down, preheat your oven to 350 degrees (F) and spray a 9 x 13 baking dish with nonstick cooking spray. Set Aside....


In a medium sized mixing bowl combine eggs, milk, 1 tsp chili powder, and a 1/2 tsp salt. Mix until well blended. The longer you beat it the fluffier. Set aside....


Now, we build/layer :) Evenly spread the slightly fried potato mixture across the bottom of the greased pan. Then sprinkle it with the yummy crumbled seasoned bacon (it's okay if it's a slice shy, we gotta taste test right hehe).


Next, we pour the egg mixture evenly atop the potatoes, peppers and bacon. && NOW, THE GLORIOUS CREAM CHEESE!! Cut that cheese... into nice hearty lil cubes and strategically dollop them into the eggy goodness. Then top it all off with a sprinkle of shredded cheese about 1 cup or so should do, but the more the merrier as far as cheese goes! I've never once said any dish had too much cheese #Facts


 Bake that beauty in the oven for about 45 minutes. Give it a jiggle and if it's done it won't jiggle back, or insert a small thin knife into the center to test for gooeyness (you could use a tooth pick as well, HoweverI prefer to use a knife because it can be washed and reused a zillion times, and it reduces silly unnecessary wastes that truly add up. It might not seem like much, but I bet landfills contain zillions of those lil guys, probably used only once to test a baked good or whatnot~Eco-Food for Thought~ Little changes add up to big changes overtime.)


If there is no jiggle and the inserted knife... (wink, wink, nudge, nudge lol) is clean, remove that lil lovely and let it chill (if it still seems a bit gooey, cook 5-10 more minutes until firm and the knife comes out clean). Serve it up with some fresh citrus fruit or a slice of toast with jam.  Breakfast, Lunch, Brunch or Dinner is now served. Hope you enjoy! Big Cyber Hugs & Thanks For Popping In <3

;) Better lighting huh?!