Friday, February 13, 2015

Easy Cheesy Buffalo HOT dogs


Fast, Easy, and Flavorful were my culinary criteria for dinner yesterday. I was fiercely committed to spending minimal time in the kitchen and pretty much doing as little as possible around my house. Nice goals aye' lol!?! I think we all need relaxing lazy days here and there or we're destined to get burnt out. All work and no play is just no good. I'm not trying to encourage mass laziness by any means, but I do encourage a healthy balance of fun and grind. All work or All play is just unhealthy; we must find/commit to that balance just like with all the other areas of this crazy life. So um yeah, yesterday was my self designated adult play day that was to involve as little work as possible! Which included not fussing over food, just keeping it simple and satisfying. It's not that I don't love cooking up crazy concoctions, because I truly do enjoy it! I find cooking to be a great creative outlet and I GENUINELY... love the pure artistry of making a delicious one-of-a-kind meal and playing with food responsibly (plus, we gotta eat yo's lol)! Like I said though, I needed a nice lazy, low key kinda day to get rebalanced, embrace my inner bum, and just unwind. Does it get any easier or cheaper than prepackaged hot dogs in life (for real though lol)?!? Not much, that's for sure!  However, I wasn't just gonna throw some blah dog in a bun and call it a day, not that I wouldn't go ham on a plain dawg, I just figured since I WAS ONLY making hot dogs for dinner, no sides, no NADA, I'd spunk them up a tad to make it seem more like a gourmet dog while maintaining the minimal fuss philosophy. Thee ol' man said "this might be the best hot dog I've ever had," #mindblown lol! So even with minimal work and effort, my dawg was still able to pack mass flavor and possibly change my dude's life, TOTAL SCORE ;)


Whatcha' need: 


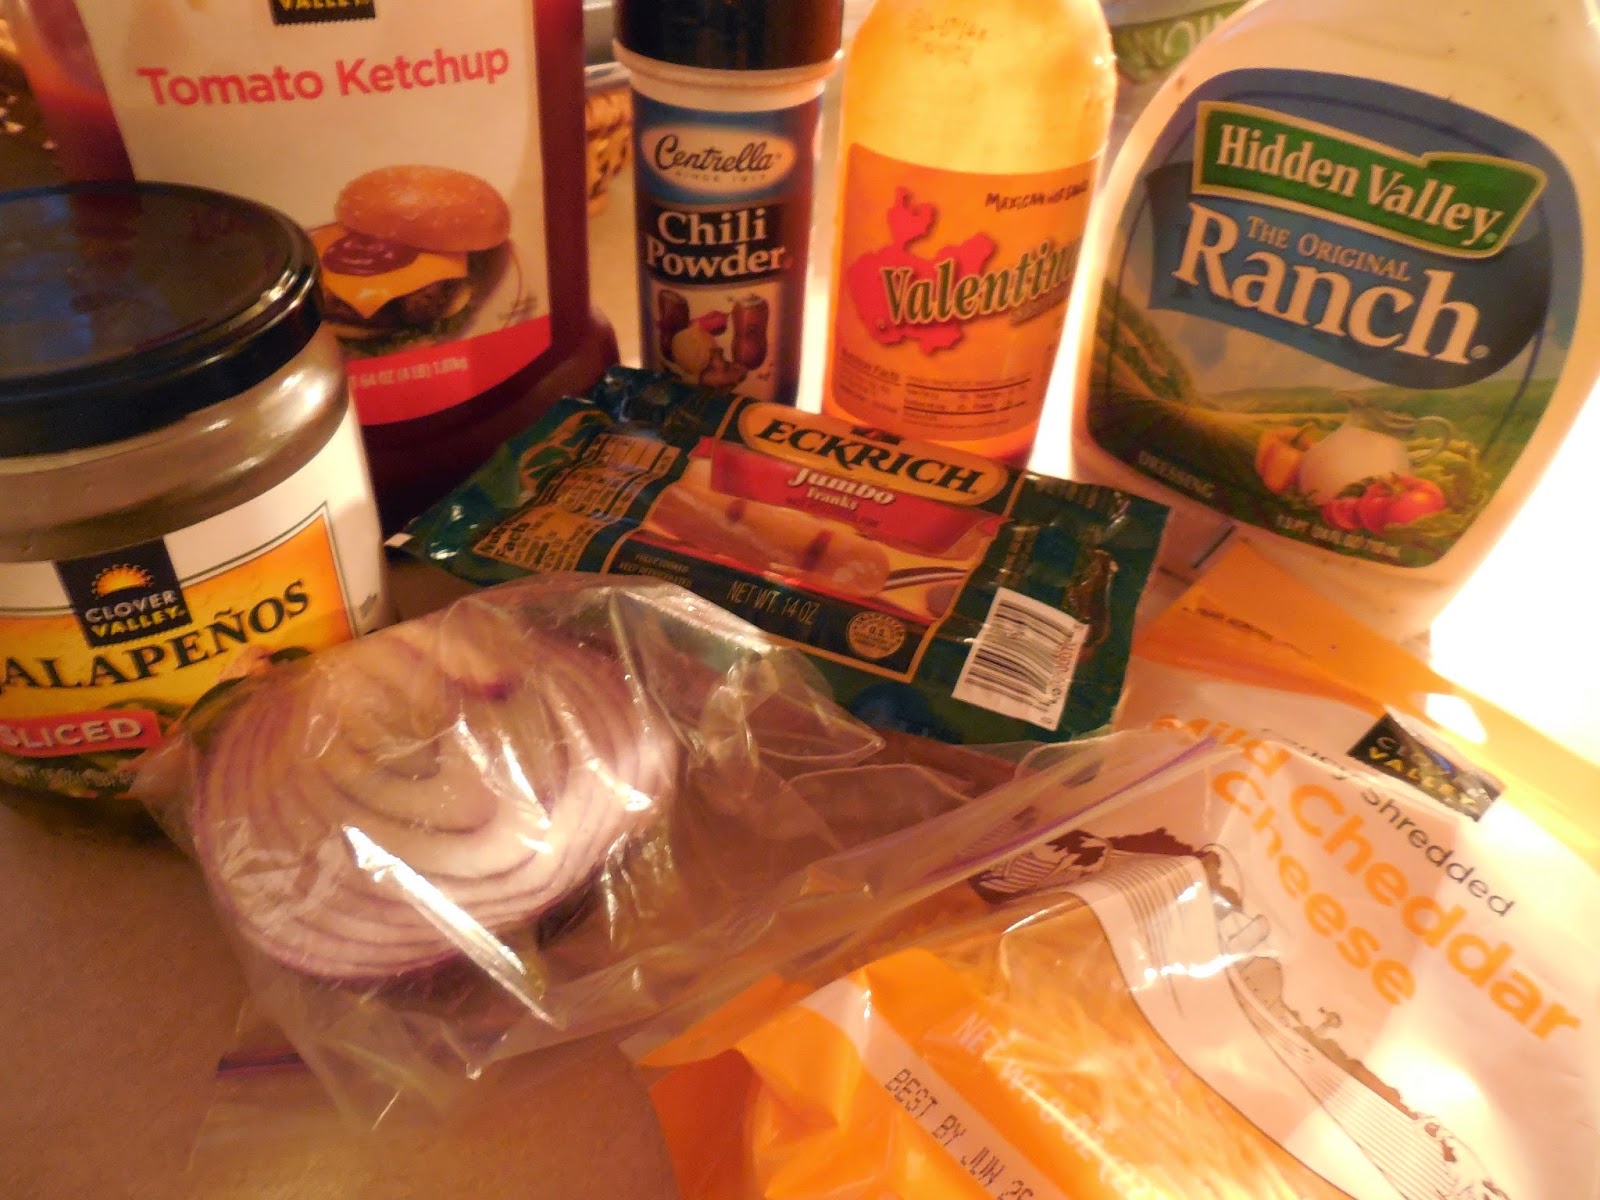
  • 1 pack hot dogs (I used all beef, but any dog would do)
  • 3-4 TBS of Hot Sauce
  • 2/3-1cup Ketchup
  • Bottled Ranch Dressing (or Blue Cheese, we're not blue cheese folks around here, but use whatever cool, creamy dressing you prefer)
  • 1 cup shredded cheddar cheese
  • 1/2 cup water
  • 1/4 tsp each of oregano, garlic pepper and lemon pepper
  • 1/2 tsp chili powder
  • Hot Dog Buns 
Optional, but highly recommended~ 1/4 cup diced Red Onion and Jarred Jalapeno Slices for garnish


Place the hot dogs and water in a large skillet and sprinkle them with half of the above suggested dry seasonings (approx). Cook over medium heat for about 10-15 minutes or until the dogs swell and all the water has evaporated.


Once the water has vanished, lower the heat slightly and allow the hot dogs to brown up and get crisp on the outside to your desired liking. We prefer them a little darker like they just came off a grill, so I let them brown for about 5-10 minutes, frequently rolling/flipping them about to avoid excessive charring, but still giving them enough space to do their charring thang ;)


Meanwhile, in a small bowl combine the hot sauce, ketchup, and the remaining dry seasonings (easy huh!)


Once the dawgs have the texture and color you like, turn the heat down a tad and smother them in the hot sauce mixture. Try to show all of them equal love and spread them around in the sauce. Rolling and turning them for about 5 more minutes until the sauce is mostly absorbed and they all look well coated.


Then turn off the heat, sprinkle them with the shredded cheddar, and cover those beauts with a lid or plate for about 5 minutes. Just so the cheese can get nice and gooey, and proceed to yumville!


Meanwhile, grab your buns...ranch dressing, and dice up the onion and pepper. Now we construct thee Cheesy Buffalo Dog


Place the gooey cheesy hot dog in the bun, drizzle it with ranch dressing, and sprinkle it with onions and peppers. WHAM BAM! We just made an easy, but fanciful Cheesy Buffalo HOT dog and only dirtied a few dishes! ~ Insert Happy Dances~ This dawg would go great with some mac n' cheese, a baked potato, simple salad or is satisfying enough Ala solo.


Hope you enjoy it as much as we did, cuz' it's pretty doggone good ;) Thanks for Popping In and Big Hugs!


Tuesday, February 10, 2015

Fully Loaded Jalapeno Popper Potato Frittata


I <3 breakfast foods. CERiously. One of my all time fav comfort foods is a simple fried egg sandwich; it's versatile (endless combo opts), easy, comforting, and it takes like 7 minutes max. to throw together! I was literally raised on breakfast foods for dinner, it was one of my favorite nights of the week actually. HECK TO THE YEAH pancakes, french toast, fried eggs and bologna sandwiches, biscuits and gravy (my Bros' favorite, which almost made me hate it as a kid because almost EVERY SINGLE TIME my Mum asked what they wanted to eat... 95% of the time it was friggin B&G, like I was in total food shock if they chose something different lol), oatmeal and toast, or really anything smothered in maple syrup is a win! No joke though, if you're serving breakfast food at night I'm SOOo down to chow w/ you. I don't care if it's 4 in the wee morn or 11 at night, I'll eat french toast and fried potatoes like they are goin' out of style (tho, I'm pretty sure they'll forever stand the foodie tests of time aka timeless)! If loving breakfast at night is wrong then I definitely don't want to be right ;) Any who....this "egg bake," as my Mum would call it, is fully loaded with crispy bacon and potatoes, zesty jalapeno peppers and red onion, gooey globs of cream cheese, and of course the magnificent, wondrous, under-estimated EGG! YUP, this dish has it going on like King Kong Peoples! Brace yo' selves for edible magic ;)


The Culprits aka Wicked Good Ingredients:


  • 1/3 diced jalapeno peppers
  • 1/2 lb bacon (pork or turkey)
  • 8 large eggs
  • 4 medium sized russet potatoes (or about 2 cups frozen, thawed southern style hash browns)
  • 8 oz Cream Cheese 
  • 1 cup milk
  • 1 cup shredded Mexican Cheese (or Pepper Jack)
  • 2 TBS of Hot Sauce
  • Opt~ 1 TBS of Pickled Pepper Juice from Jar Jalapenos
  • 1/2 of a Large Red Onion, finely diced (or 1 small)  
  •  Additional Spices To Your Preferences: 2 tsp Chili Powder, 1 tsp Garlic, 2 tsp Salt, 1 tsp Red Pepper Flakes, 1 tsp Lemon Pepper, paprika

Start by prepping your potatoes. Clean and remove skins that are knotty or contain icky blemishes. Cut the potato into fourths (or in half twice) then dice them into similar sized 1/4 inch cubes or chunks. Place them in a medium sized sauce pan and cover them with water and sprinkle w/ 1 tsp of salt. Bring them to a boil over medium heat and cook about 10 minutes or so until fork tender. Drain the potatoes well and set aside.


Still working on this food photo jazz, bare with me folks lol

Now let's talk bacon. I always add a sprinkle or dash of seasoning to the bacon like lemon pepper or chili powder just for added depth and extra yum, but bacon is beautiful just as is so season or don't season to your liking. Pan fry the bacon in a large frying pan over medium heat until crisp or two your desired liking, if they are a bit extra crispy that's okay too!! They'll be taking a soft bath in eggs soon enough so no frets!


 While the bacon cooks, start prepping your red onion and jalapeno peppers. Red onion is pretty assertive so I decided to only add a half, but it's your thang do what you wanna do ;) 


Once the bacon is all cooked and cooling on a paper towel lined plate, turn the heat down a tad and slowly add in the onion, peppers, and potatoes to the pan with the bacon drippings. These items all contain water content so carefully and slowly is key when adding them to hot grease to prevent painful chaotic happenings lol!  Drizzle the potatoes/veggies with hot sauce and sprinkle with 1 tsp chili powder, garlic, red pepper flakes, 1/2 tsp salt and fry for about 10-15 minutes stirring occasionally to prevent sticking or burning.


While all that is going down, preheat your oven to 350 degrees (F) and spray a 9 x 13 baking dish with nonstick cooking spray. Set Aside....


In a medium sized mixing bowl combine eggs, milk, 1 tsp chili powder, and a 1/2 tsp salt. Mix until well blended. The longer you beat it the fluffier. Set aside....


Now, we build/layer :) Evenly spread the slightly fried potato mixture across the bottom of the greased pan. Then sprinkle it with the yummy crumbled seasoned bacon (it's okay if it's a slice shy, we gotta taste test right hehe).


Next, we pour the egg mixture evenly atop the potatoes, peppers and bacon. && NOW, THE GLORIOUS CREAM CHEESE!! Cut that cheese... into nice hearty lil cubes and strategically dollop them into the eggy goodness. Then top it all off with a sprinkle of shredded cheese about 1 cup or so should do, but the more the merrier as far as cheese goes! I've never once said any dish had too much cheese #Facts


 Bake that beauty in the oven for about 45 minutes. Give it a jiggle and if it's done it won't jiggle back, or insert a small thin knife into the center to test for gooeyness (you could use a tooth pick as well, HoweverI prefer to use a knife because it can be washed and reused a zillion times, and it reduces silly unnecessary wastes that truly add up. It might not seem like much, but I bet landfills contain zillions of those lil guys, probably used only once to test a baked good or whatnot~Eco-Food for Thought~ Little changes add up to big changes overtime.)


If there is no jiggle and the inserted knife... (wink, wink, nudge, nudge lol) is clean, remove that lil lovely and let it chill (if it still seems a bit gooey, cook 5-10 more minutes until firm and the knife comes out clean). Serve it up with some fresh citrus fruit or a slice of toast with jam.  Breakfast, Lunch, Brunch or Dinner is now served. Hope you enjoy! Big Cyber Hugs & Thanks For Popping In <3

;) Better lighting huh?!

Saturday, February 7, 2015

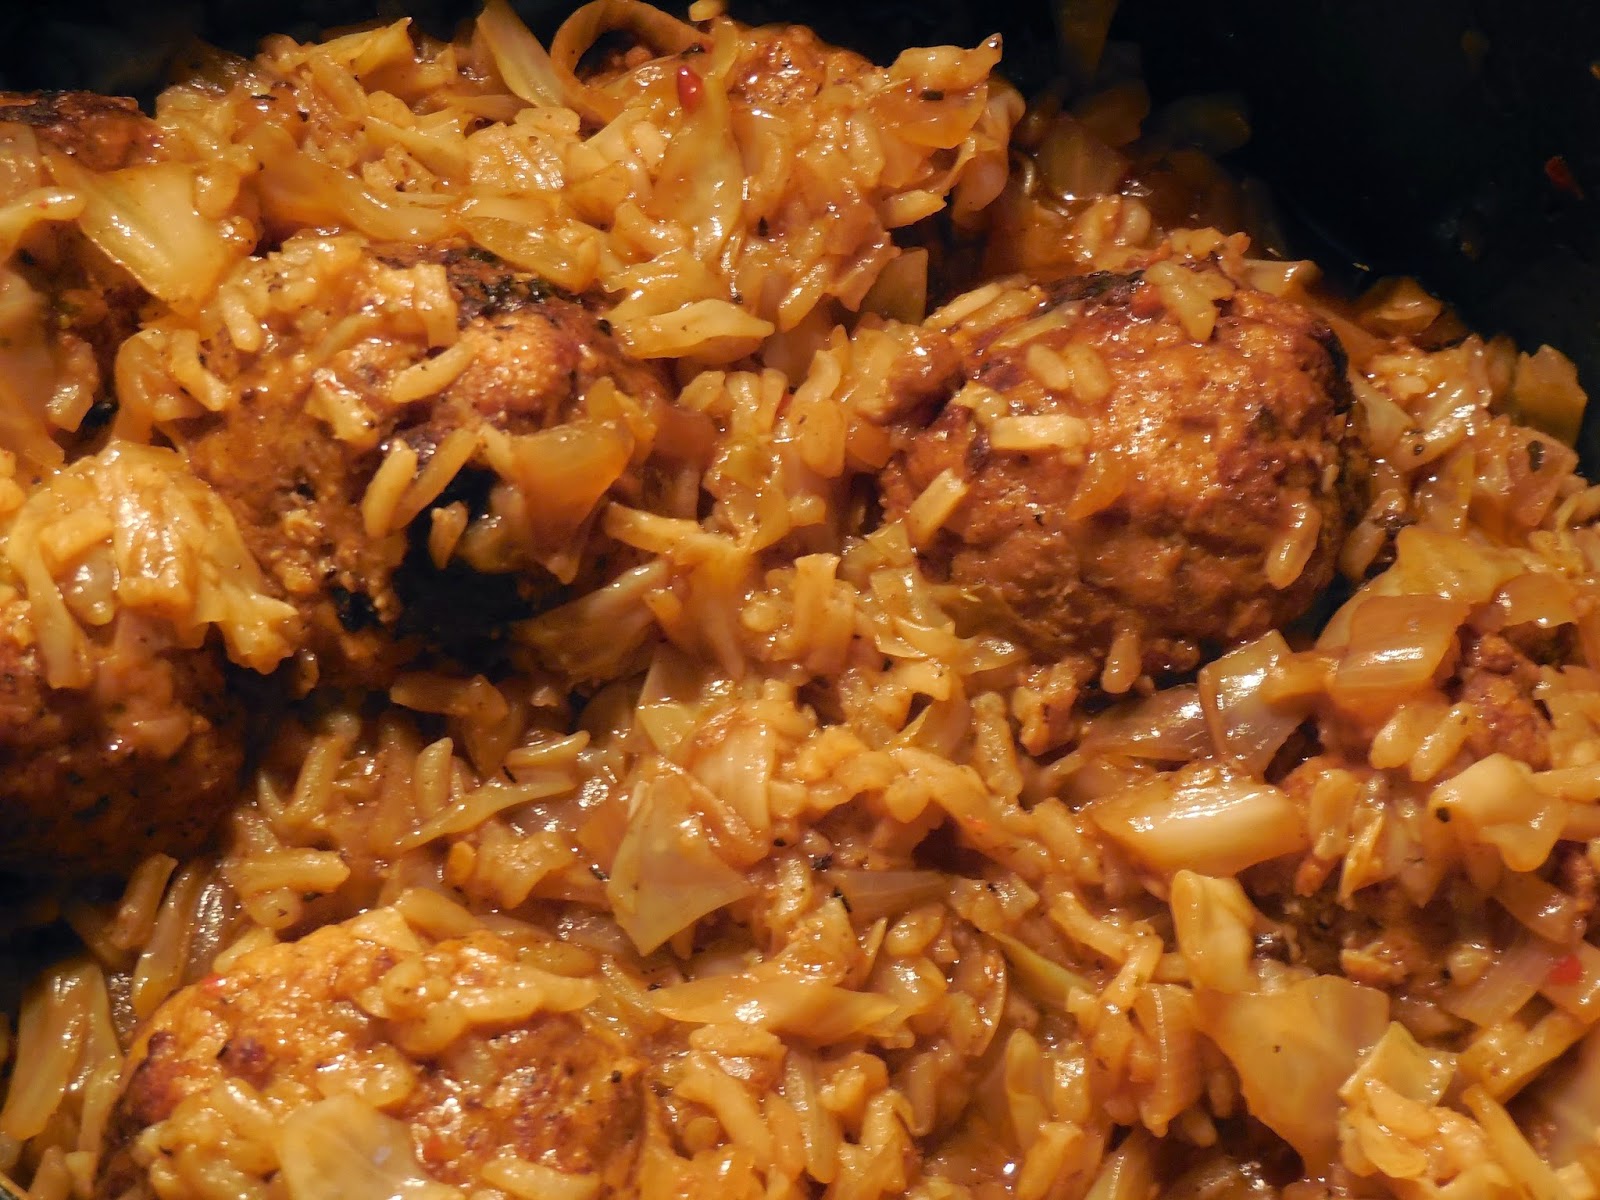
Smothered Apple Pork Meatballs with Fried Cabbage and French Onion Rice


 Generally, I try to keep things fairly simple and limit the amount of dishes I create or steps I take when I'm cooking (if you haven't noticed lol). I'm all about easy, one pot meals, that can be whipped up in a jiffy, but I decided to play around in the kitchen a bit longer than usual yesterday. Not that I couldn't have made a similar dish with less effort, it was really just a hankering for meatballs. Honestly, I don't believe I've ever had an all pork meatball, so I wanted to give that a whirl! Plus, my fiance is quite a meatball. The more meat the better in his carnivorous world, a where's the beef (?) type of person even if the recipe contains 2lbs of meat in it lol! I try to remind him that humans are suppose to be omnivores, but he's not buying it and often I have to find tricky ways to sneak the veggies I love into meals he won't hate. Just seeing a head of cabbage in the fridge freaks him out (I'm starting to think he has a veggie phobia) I asked him many moon's ago, if he liked strawberry, because as previously stated, I LOVE ALMOST ANYTHING STRAWBERRY RELATED! He clearly said yes.... so I got some Beyer's Strawberry Ice cream with the big chunks of fruit in it, and I SHAT YOU NOT, he asked me why I can't just get the artificially flavored stuff, ya know, the kind without fruit in it (that tastes nothing like a REAL friggin' strawberry)!!?! He likes strawberry flavored soda, ice cream, or milk, but not real strawberries, that's pink sugar homey! I don't think he knows what a real strawberry even tastes like, but he don't like it LOL! SMH, seriously, he can be quite the pain in the biscuits to cook for! I savor those chunks of real strawberries, they are my favorite part, but he is a boxed food, plain Jane, carnivore with a mound of carbs down to the core kinda dude! (Can you tell, it drives me batty a bit lol?) N>E ways :) I mentioned, possibly, making meatballs and he lit up like a kid on Christmas. So, if I didn't make meatballs, I'd have heard.... "I thought you were gonna make meatballs for dinner!" YUP, so instead of taking the easier route, I decided to indulge him and make meatballs, but I wasn't just going to make a stack of meatballs for my carnivore pal, I was gonna get me some veggies too ;) Though he doesn't like onions (OMG), (he just likes onion flavors)... he does somehow (?) love french onion chip dip and can eat A WHOLE CONTAINER in one sitting, so I tossed some onion soup mix into the equation as well. YUP, omnivore homey don't play that ;) Now that I've got that off my chest... let's dish!


Whatcha' Need:

For the Apple Pork Meatballs
  • 1.5-2 lbs. ground pork sausage
  • 1/2 cup applesauce
  • 2/3 cup Italian Seasoned Breadcrumbs (I used Italian Herb Panko)
  • 1/4-1/2 teaspoon each or red pepper flakes, oregano, paprika, and lemon pepper (pinch of salt) 
  • 2 large eggs     

Place all the ingredients in a large mixing bowl and combine (seriously, get your clean hands in there and get down and dirty! That is TRULY thee best, old-fashioned way to combine ingredients for meatballs or a meatloaf) Once everything is well combined, (wash yo' hands ;) place a little bit of oil, bacon grease, or butter into a skillet and preheat it over medium heat. Using a 1/3 cup measuring cup or an ice cream scooper, place the desired amount of meat in the palm of your hand and roll in opposite directions with both hands to form a ball. (Old Italian Meatball Tip~Don't over handle or "bologna ball," as they say, the meatballs; it will take away from the airiness of the meatballs resulting in a denser, less fluffy product).


 Drop them in the skillet and repeat until all the meat mix is used. I cooked mine for about 5-10 minutes on each side before removing them with a slotted spoon and placing them in a slightly greased muffin pan. (My fella and I, like things a lil crispier, so if you don't, only brown them for a few minutes (3-5) on each side) My meatballs were massive and it made exactly 12 muffin sized meatballs! This will serve six people with ease! While you are finishing up browning the meatballs, preheat the oven to 375 degrees (F). Once all the meatballs have been browned, place them in the oven for 25 minutes.


Whatcha' Need: 

For the Cabbage and Onion Rice
  • A small head of cabbage
  • large onion (I used yellow)
  • 1 packet dry onion soup mix
  • 2 TBS Butter or Bacon Grease
  • 2 TBS Lemon Juice 
  • 2 TBS Soy Sauce
  • 3 1/4 cups water
  • 1 cup bulk white rice 
additional spices~oregano, red pepper flakes, paprika, garlic, salt/pepper (about 1/4 tsp or more of each, season to taste pref.)


While the meatballs are cooking, shred or thinly slice your onion and cabbage. This isn't necessary if everyone likes meaty chunks of cabbage in your family, but as previously stated, I have to sneak things like that in subtly, (like a Kitchen Ninja of sorts hehehe) and this is much easier if the veggies are smaller or incognito like ;) Next, place the veggies in a medium/large pot with a fitted lid, along with everything except the onion soup mix, water and rice. 

Cook on med. heat stirring regularly for about 15 minutes or until the cabbage has wilted down to about half the size and is tender, but not soggy. By this time, you should have removed the meatballs from the oven and they should have been chilling for a few memento's.


Next... You are going to take those yummy meatballs & squiggle them into the cabbage mixture, lower the heat just slightly, and allow all those yummy flavors to mesh  together for about 15 minutes or so with a lid on. Stir gently just to avoid burning, but otherwise let'm chill.


Next add the water and stir in the dry onion soup mix. Allow the mixture to come to a slight boil, just bubbling a bit. Then add the rice, stir, reduce the heat to low, and put the lid back on it. Cook for about 25 more minutes over low heat disturbing as minimally as possible. I stirred mine twice, just very briefly in that amount of time. When that 25 minutes is up, most of the liquid should be absorbed. Stir well, and test a few pieces of the rice just to ensure ideal doneness (if need be, cook a few extra minutes stirring frequently).


Turn that glorious masterpiece off and allow it to cool a few minutes before hitting it with a sprinkle of cheese. Parmesan, Cheddar, or Swiss would all taste great on this dish, but it's completely optional and tastes magically delish without it! The Swed in me, however, thinks everything tastes better with a sprinkle of cheese, dash of dairy, or dollop of cream, just sayin'. Hope you enjoy and Big Hugs <3

Comfort Food at its finest


Monday, February 2, 2015

Crockpot Strawberry Cinnamon Shredded Chicken (N' Waffles)


 I hope everyone had a wonderful Super Bowl. If the Chicago Bears had played.... it'd have been a lot better, but I'm not bias or anything ;) No, it was a really good game and the commercials were pretty excellent too! I'm a huge animal lover so of course the Budweiser commercial with the adorable lost puppy and gorgeous horses tugged at my ticker, as well as, the silly Sprint commercial with the screaming goats and donkey gave me a good giggle among others. Something about screaming goats always makes smile!?! I heard a 30 second commercial during the big game averaged around 4.5 million dollars! THAT'S JUST PLAIN CRAY CRAY lol! How are there hungry children or homeless people in the world, but these companies can fork over 4.5 million bucks for a 30 second ad during the Super Bowl? It is beyond absurd and horribly sad (in my opinion), really, but I'm not trying to get super heavy today. Let's keep it light, I suppose, and talk about my game day version of chicken n' waffles! This is a fun and SUPER SIMPLE twist on the classic fried chicken & waffles combo. As far as I'm concerned... these have to be a bit healthier than the fried version, I'm not labeling it diet friendly by any means, but it had to cut a few caloric corners by making them in the crock pot minus all the grease and extra breading! So yeah, we'll just pretend these are diet chicken n' waffles or at least less guilt inducing chicken n' waffles lol!


Whatcha' Need:

  • 1.5-2 lbs Chicken Breasts
  • 1/4-1/3 cup strawberry preserves (or jelly)
  • 1/2 tsp ground cinnamon
  • 3 TBS brown sugar
  • 2 TBS maple syrup
  • 1/2 tsp of each red pepper flakes, lemon pepper, and minced garlic
  • 1/4 tsp each Chili powder and Salt
  • 2 TBS Lemon Juice
  • 2 1/4 cups water 1 small yellow onion finely diced (opt)
  • ~Maple Syrup, Crock pot, Waffle Iron, Butter~


Additional Materials: boxed waffle/pancake mix and the ingredients listed to make the desired amount of waffles (IE eggs, oil, water~ I used Hungry Jack mix),  or make it even easier and use cooked frozen waffles or canned honey biscuits (I'll prob put it on some flaky biscuits next time cuz that sounds swell)! If you want to fancy it up even more make a homemade waffle recipe of your choice, I'll  find an easy one to include and place a link to it at the bottom for all my anti-boxed food folks out there. Either way, this chicken will taste great on just about any bread like vessel you choose ;) Such as... my jiffy corn and tater cakes, wink, wink here's a link to those beauts:  http://thriftytreehuggary.blogspot.com/2015/01/jiffy-corn-and-tater-cakes.html

Picture these lovelies topped some spicy sweet shredded chicken, OH YEAH ;)


I started by dicing my onion and layering it across the bottom of my crock pot. Then, I placed the chicken breasts on top of the onions and sprinkled it with all the dry spices.


In a small mixing bowl, I combined the preserves, water, brown sugar, lemon juice, and maple syrup to make a sauce or glaze of sorts. Then I poured it onto the chicken and onions in the crock pot, cover it with the lid, and cook it on high for 4 1/2 hours (you could also cook it on low for about 6 hours if you prefer, but I was hungry, so I cranked that baby up lol).


Not the prettiest pic ever but this was about 2. 5 hrs in and it smells devine!

When the chicken is fork tender, like so tender that when you attempt to poke it, it practically falls apart, remove it from the crock and place it in a large mixing bowl and shred it up with two forks. Mine was so tender by that time that I SERIOUSLY, barely had to apply any force to the ol' pulling process! The chicken didn't fight back at all, SCORE ~ Fall apart tender = WAY YUMMY :)


Once you have your chicken all nice and shredded, place it back into the crock pot with all those yummy juices and spices and cook for about 30 more minutes. While that is going down... start working on your waffles. I made a generous stack of waffles because this makes quite a bit of shredded chicken and I didn't want to bust out the waffle iron again later on (call it lazy ;) but I call it efficient, why work harder when we can work smarter right lol). I also cooked the waffles a bit darker and longer than usual because I didn't want a soggy situation on my hands.


When you have a nice stack of waffles ready and buttered, turn that crock off, and get ready to chow down. Place one large buttered waffle on a plate, and using a slotted spoon dish up a nice scoop of the chicken right on top of the waffle. Drizzle it with a little maple syrup and prepare for taste bud domination. This dish is crazy easy, fun, and super yummy &&& we can even claim it is a little healthier than it's fried friend! Winner, winner, Chicken n' Waffle Dinner.


Big Hugs and I hope you enjoy my funky twist on this classic dish!
My boyfriend topped his off with Shredded Mozz. Cheese and devoured it, despite him being a picky eater ;)


     Here's a link to an easy homemade waffle recipe for those feeling extra ambitious:
  http://www.melskitchencafe.com/classic-buttermilk-waffles-with-cheese/